
Beginning Basic Drawing
Part One-Discovering Shading Skills
Part Two- Geometric Shapes in Drawing
Part One
Step One -Using a Pencil Follow the Instructions on Each Page
Step Two -You Must Complete Two of the Next Four Lessons on Shading
Step Three -Print Out the Lessons You Wish to Complete out of the Four Shown By FIrst Dragging That Page to Your Desktop
Step Four -Make a Photograph of Your Completed Lesson and send it via Email as an Attachment
Step Five -In the Subject Area Put Your Name & Class Then Send Your Image to ihs.db@yahoo.com
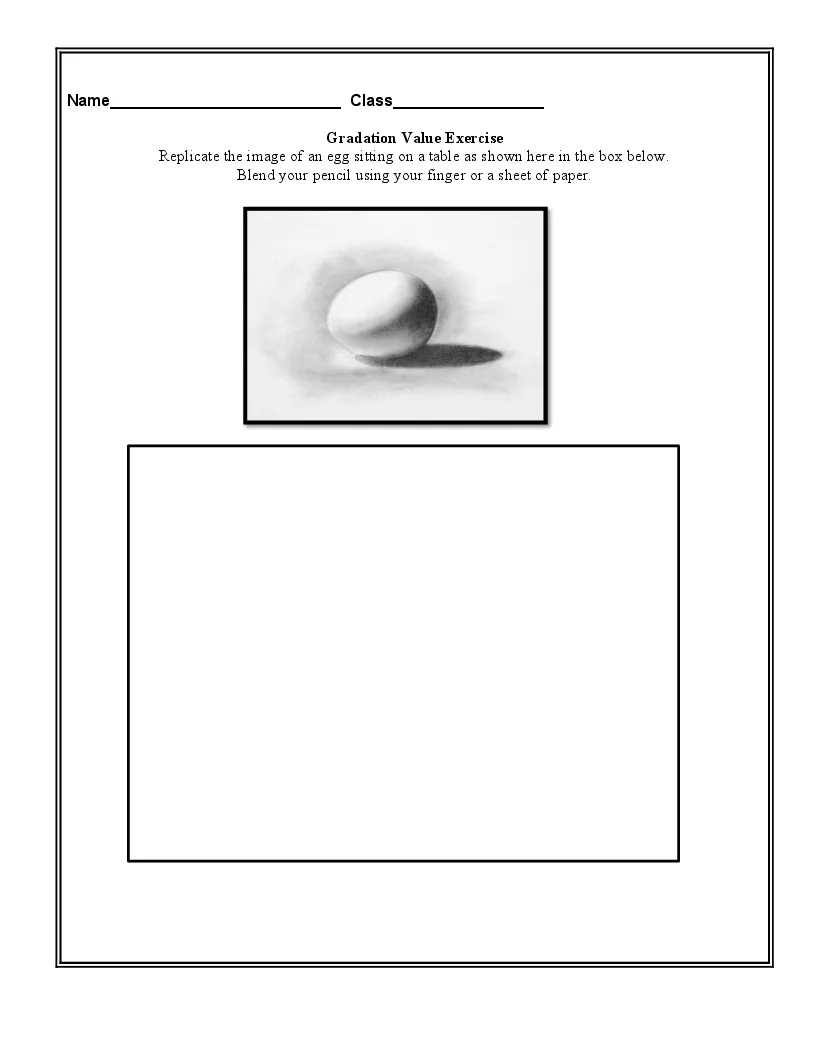
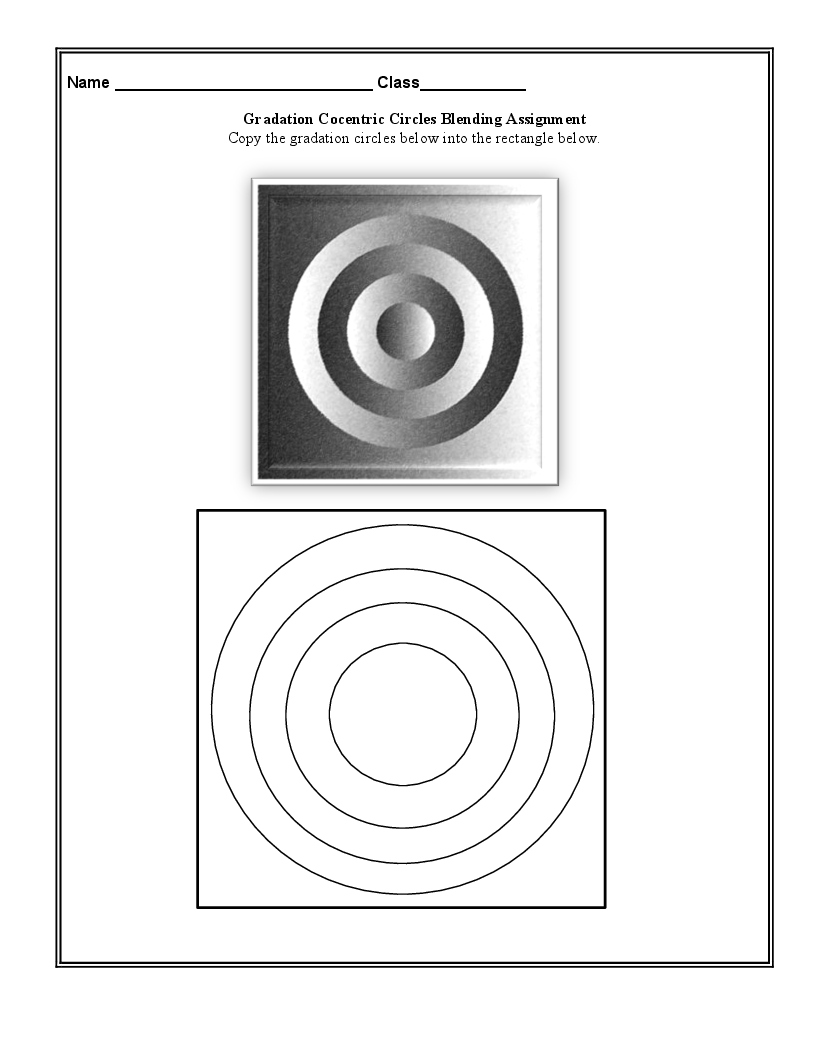
Study the various forms of shading directly below and then use those techniques in the following lessons.


Learning How To Draw Using Geometric Shapes
Step One -Print Out One of the Three Following Pages By First Dragging That Page to Your Desktop
Step Two -Complete Shading in Your Choice of Page & Make a Digital Image With Your Cell Phone
Step Three -Be Sure to Put Your Name and Class in the Subject Area of the Email Then Send the Image via Email to ihs.db@yahoo.com
A basic way to learn to draw is by first breaking up an image into geometric shapes. This is the traditional manner of establishing composition. It allows an individual to compose a subject in pieces that can altered easily. It also allows for the outline or contour line to be established. This is the line that encompasses the form or subject in relation to its border or negative space.
Below is a good sample of attempting to draw the poet Mya Angelo. One exercise here is to print out the image and shade the geometric squares to equal the black and white photo.

Print out the geometric Saint Bernard and give geometric shape a black, white or grey value to make the dog appear as close to the photo as possible.

Observe how this portrait of Dr. Martin Luther King Jr. is made up of fewer geometric shapes, almost all triangles, allowing the composition to be more clear in forming his portrait. Add shading in lead pencil to complete his portrait.
